Setup Auth0 Authentication
Step by step instructions on how to setup your credentials that will allow you to login into the Bitpoke App for WordPress.
This is the second alternative to setup your credentials for the Bitpoke App by creating an Auth0 account and application.
1. Create the AuthO account and application
-
Go to the auth0.com website and create a new account.
-
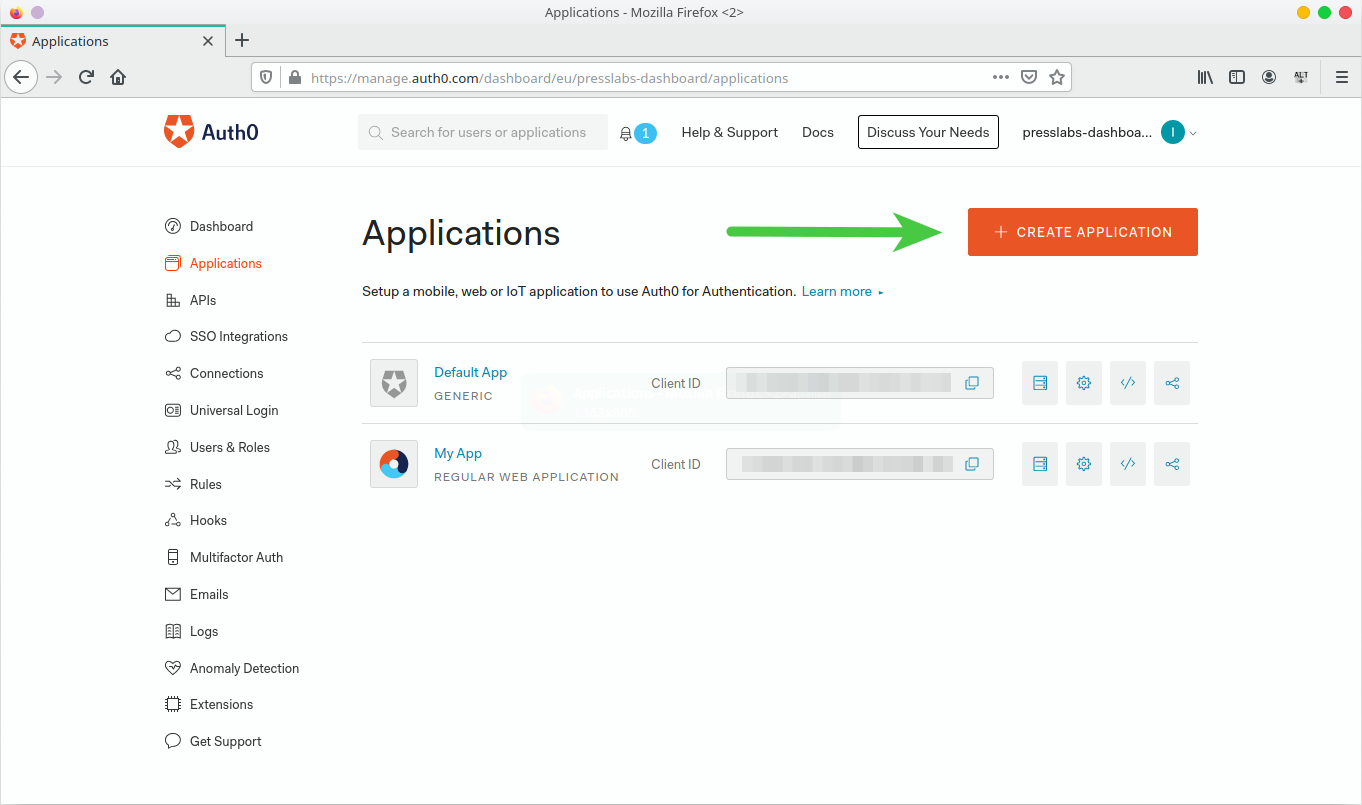
Create an Auth0 Application (e.g you can name it Bitpoke App):
-
Choose the application type
Regular Web Application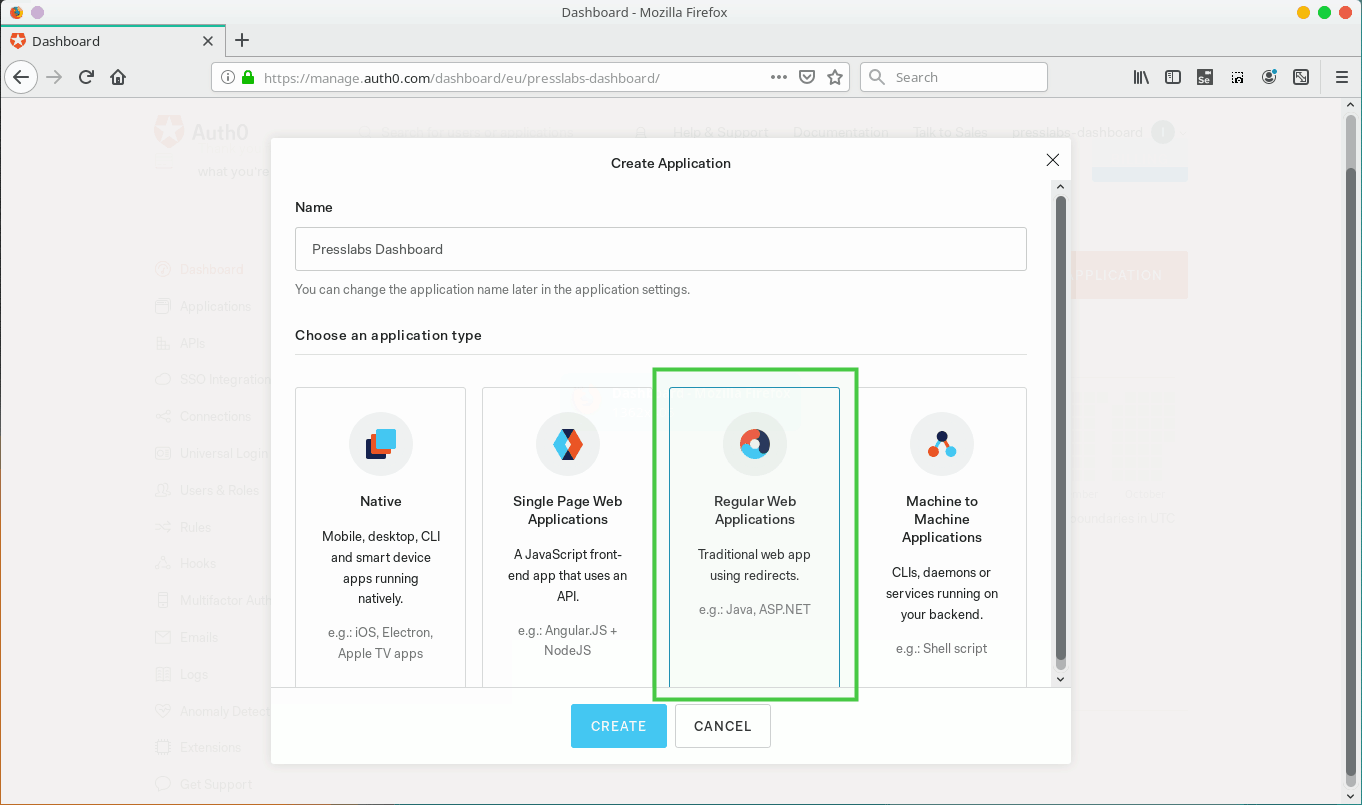
-
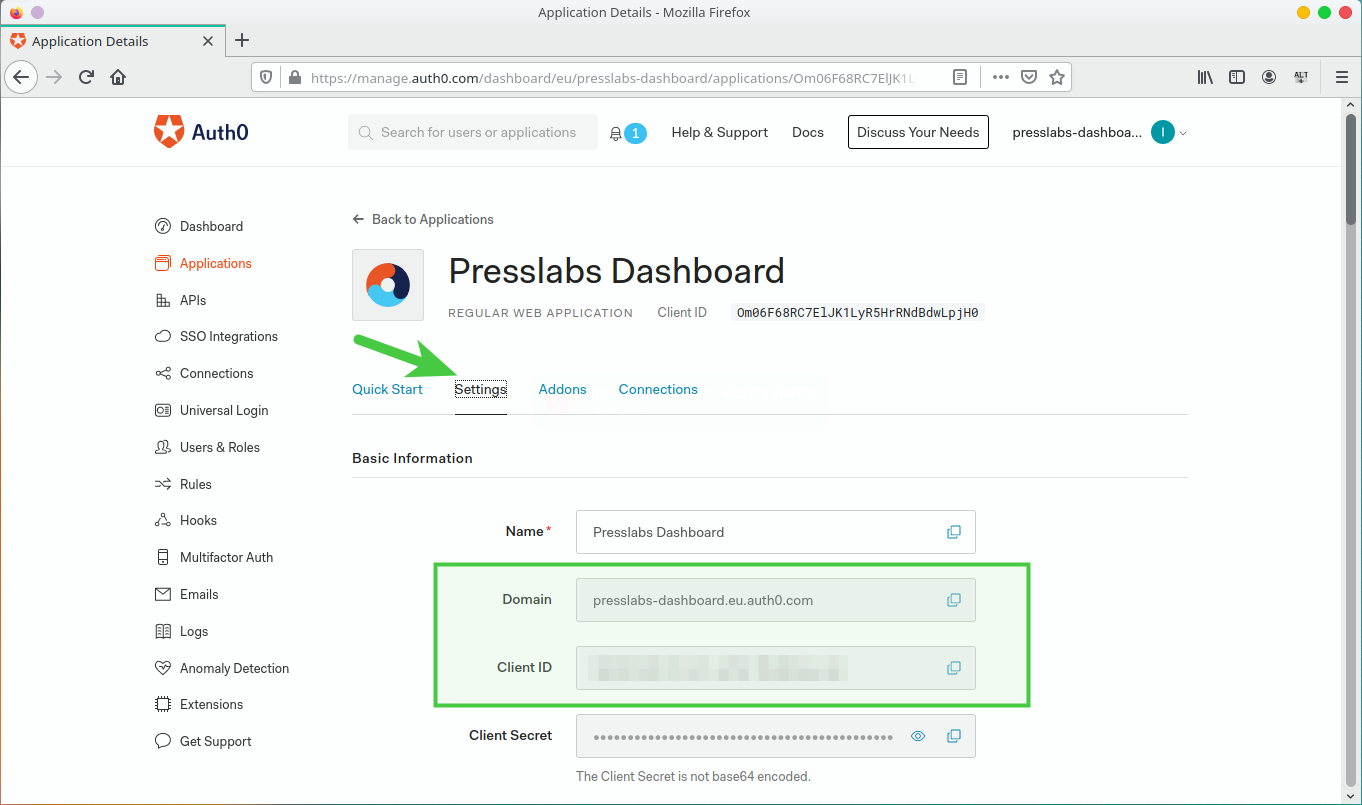
Go to the application
Settingsand note down the following:- Domain (OIDC Issuer)
- Client ID
-
Complete the following in the application Settings:
- Token Endpoint Authentication Method: Post
- Allowed Callback URLs:
https://DOMAIN - Application Login URI:
https://DOMAIN - Allowed Web Origins:
https://DOMAIN,
where
https://DOMAINis the domain that you chose for the Bitpoke App when you installed it , e.g.https://dash.myagency.com.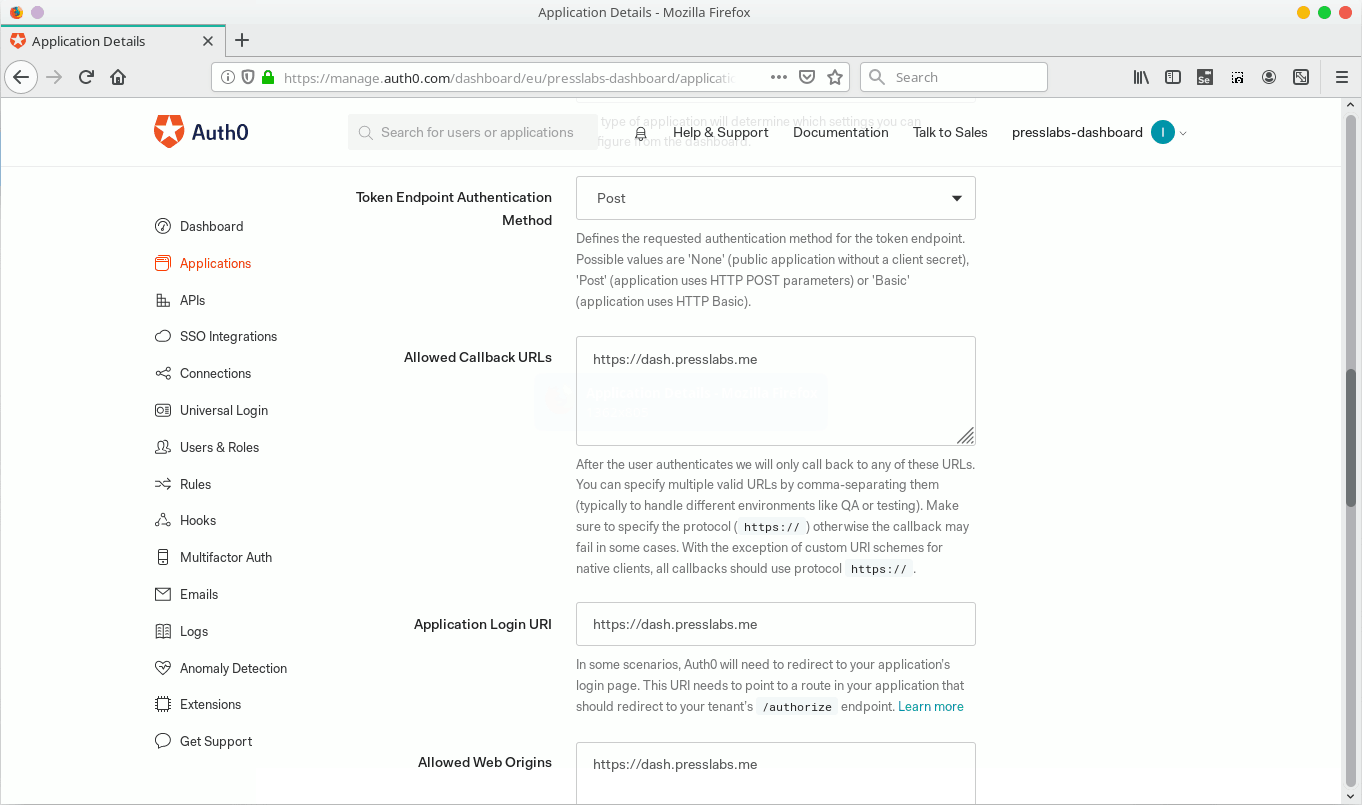
2. Allow access to the Auth0’s management API from application
-
In the Auth0 dashboard, go to
APIssection of the main menu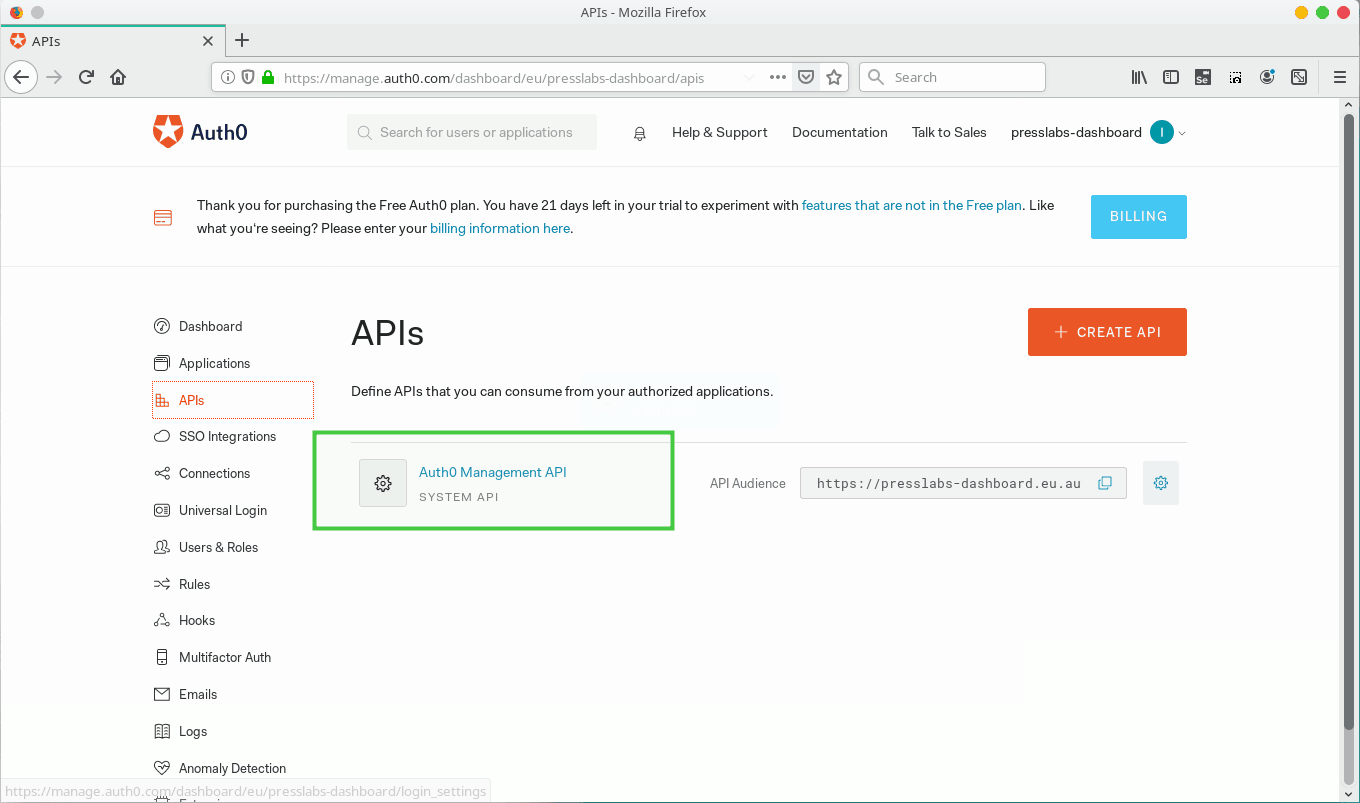
-
In
Auth0 Management API, go toMachine To Machine Applications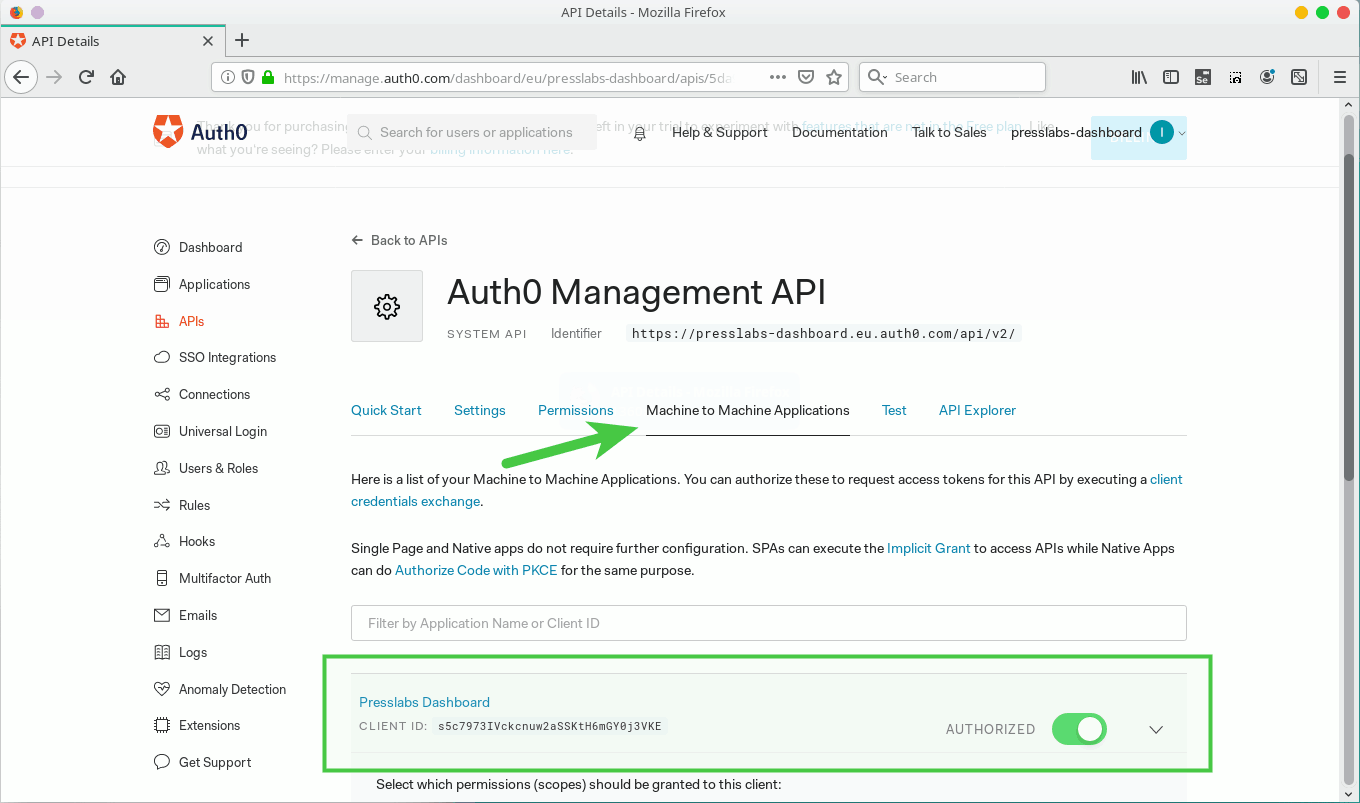
-
Make sure that
Bitpoke Appis authorized and it hasread:userspermissions. (You do that by expanding theBitpoke Appfrom the list)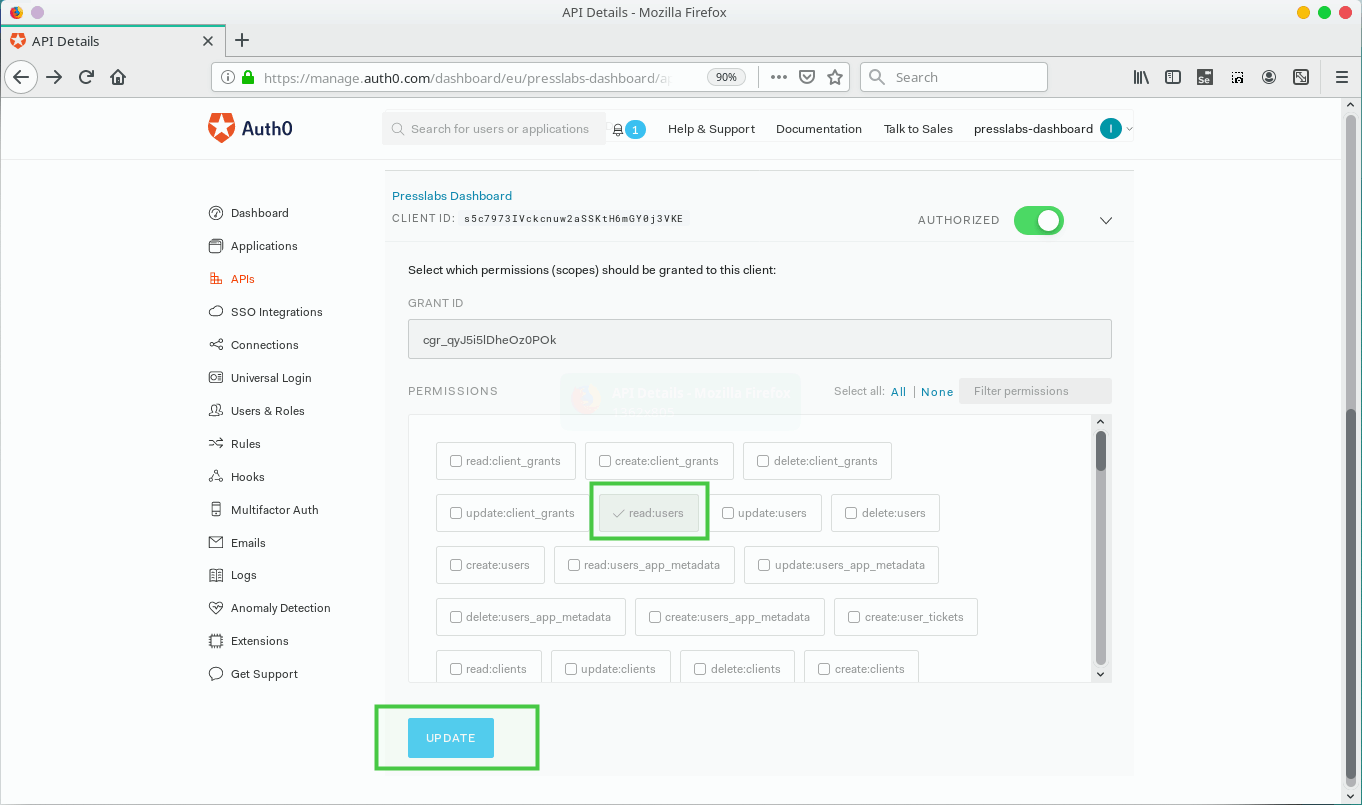
Don’t forget to press the Update button after grating the user permissions!