Schedule a dedicated node pool
When you create a cluster and install the Bitpoke App, you have by default only one default node pool. On these nodes there will be all the App components (Stack, the controllers, the Bitpoke App API, the sites, the projects etc.).
But you may need nodes with higher CPU for MySQL for example, or nodes with more RAM for Memcached. In this case you can create a new node pool with your necessary characteristics and schedule which components should run on this new node pool, and also setup tolerations to make sure that pods are not scheduled into inappropriate nods.
In this guide we’ll take a common such use case step by step, which is creating a new node pool with different CPU and scheduling the MySQL components to run on it.
WARNING
All the scheduling modifications (setting up scheduling rules, tolerations, pod deletions and k8s node upgrades) might be with downtime and they can break your site, Memcached or MySQL if not configured properly. Be very careful with these settings.
Add a new node pool
Go to your cluster on Google Cloud Platform -> Kubernetes Engine -> Clusters and select the project and cluster where you installed the Bitpoke App.
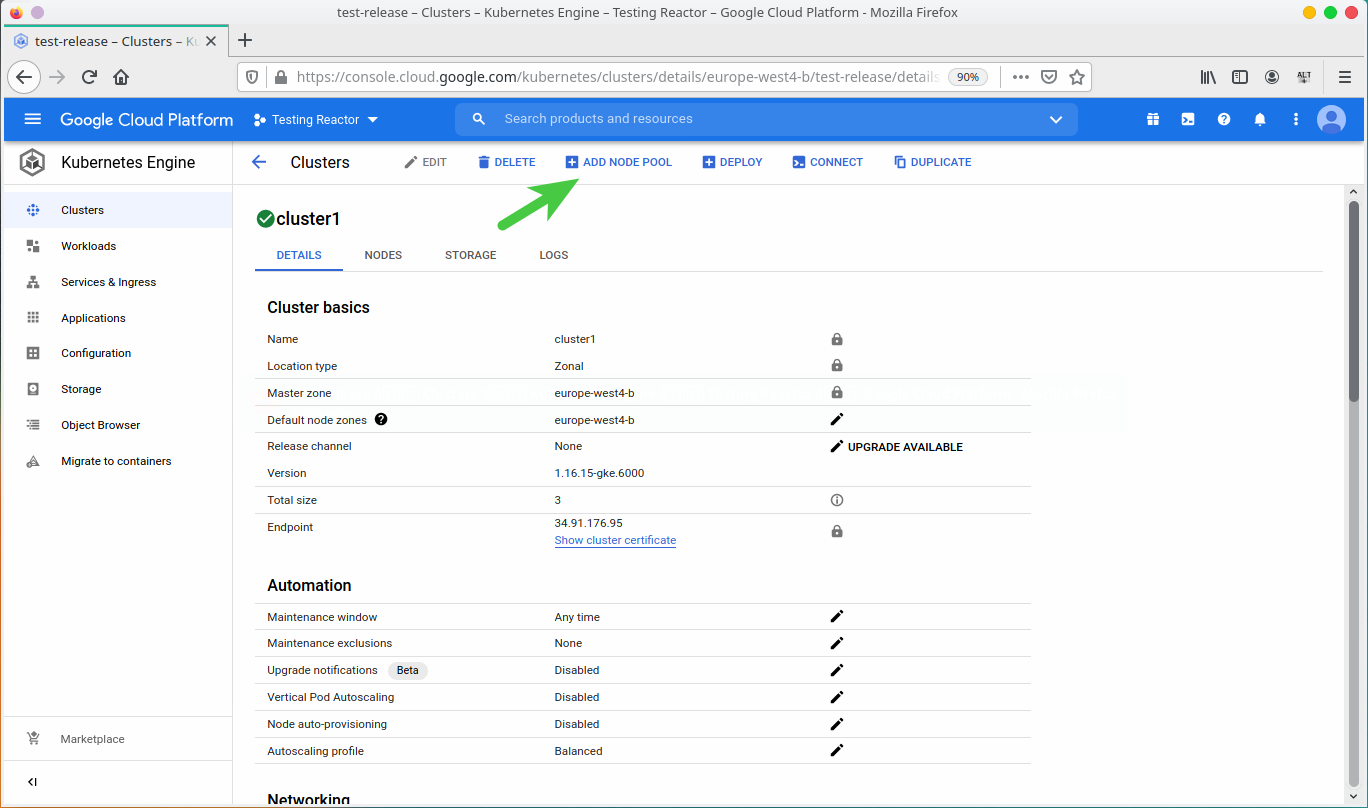
Then select Add node pool. Select at least 3 nodes and enable autoscaling:
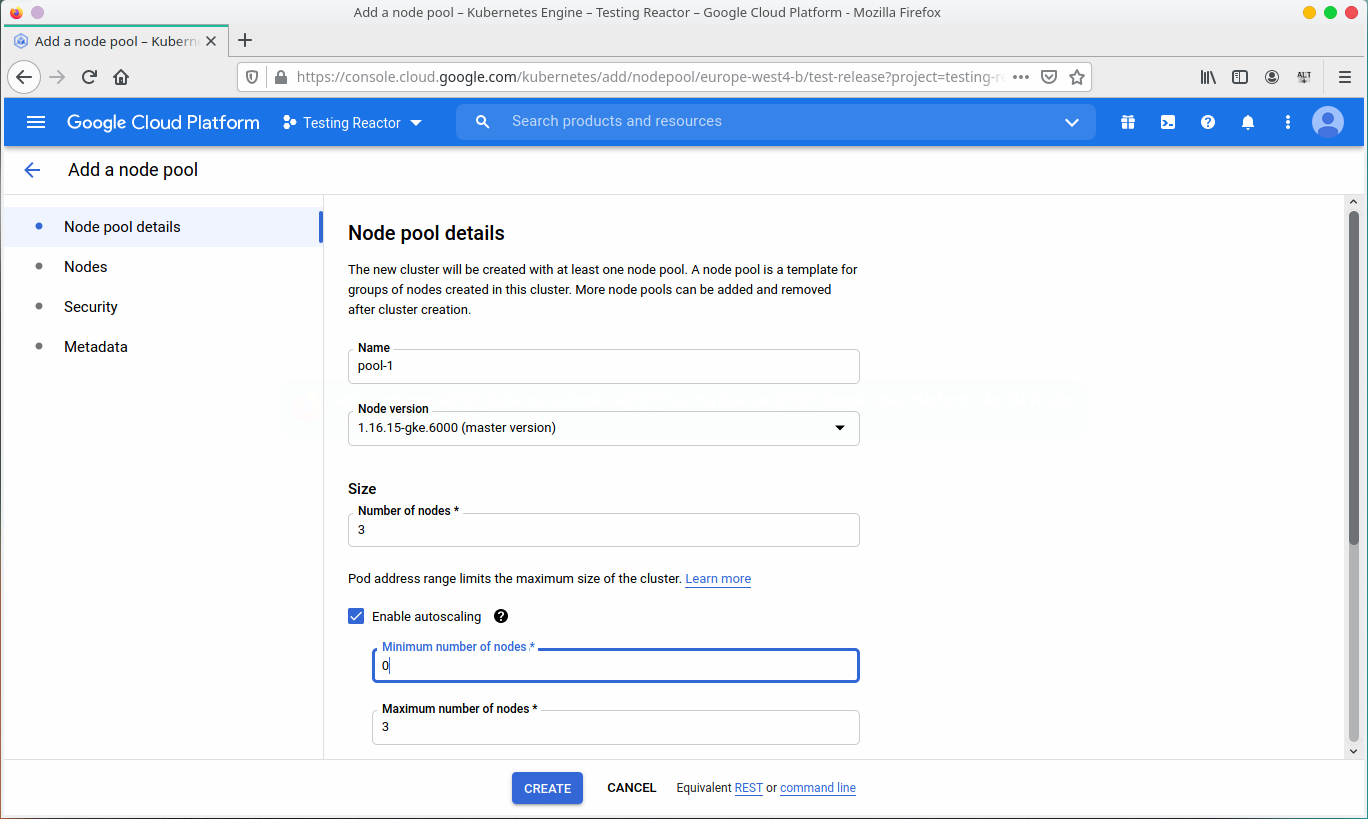
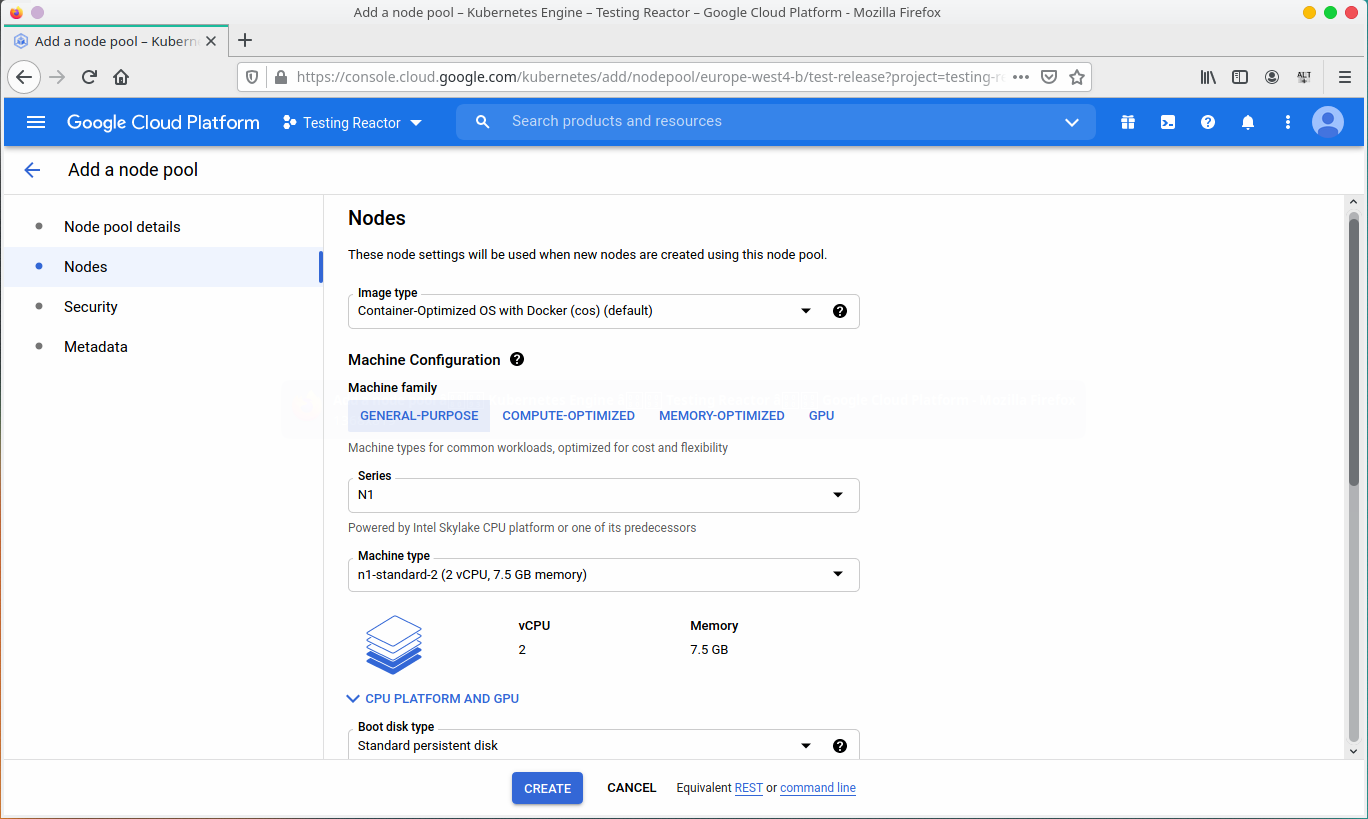
For MySQL you usually need to create a node pool with higher CPU, but in this example we’ll use n1-standard-2 for learning purposes:
The last step is to add a taint to the node pool, so that we can later setup that only the nodes tolerant to this taint can be scheduled on this new node pool.
You can add a taint when you create the node pool, from Node Metadata:
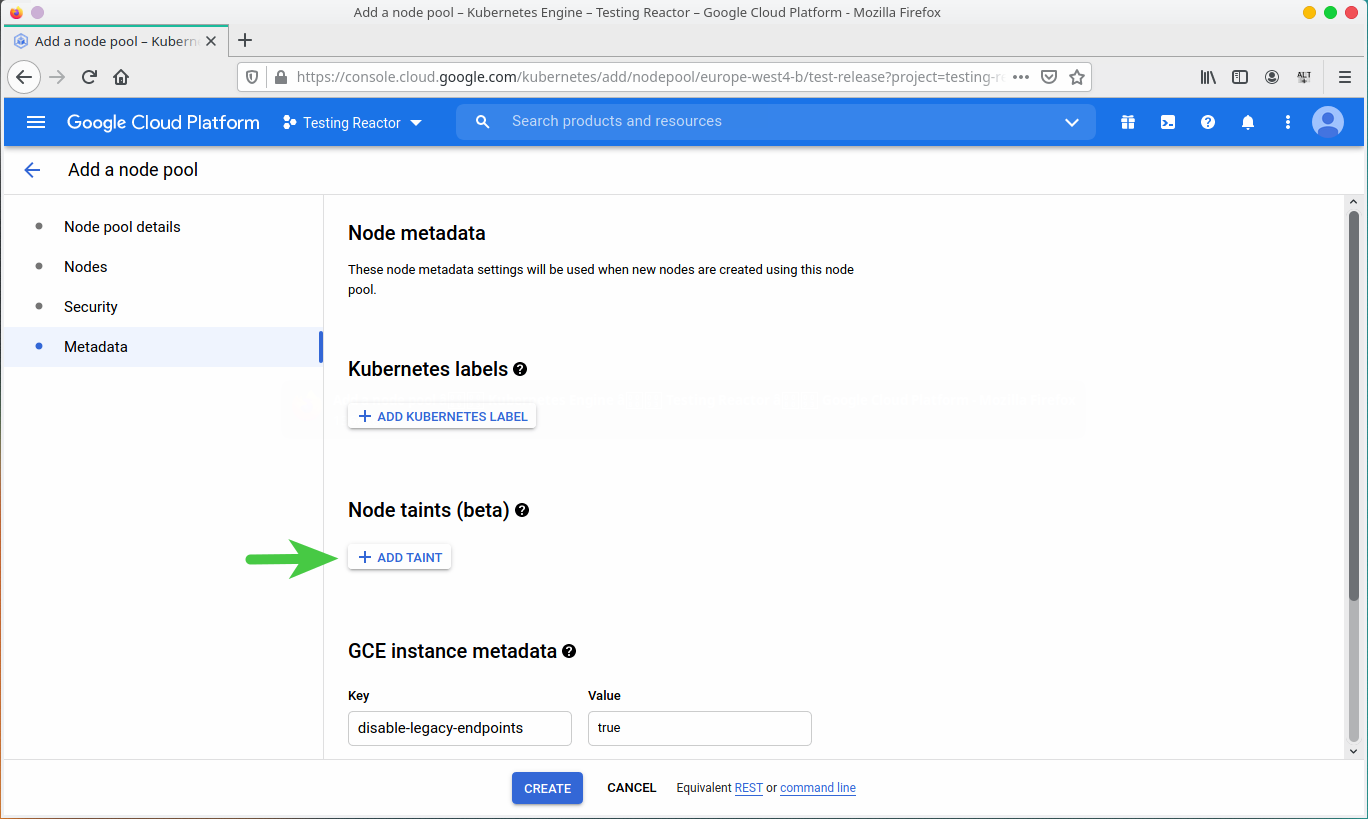
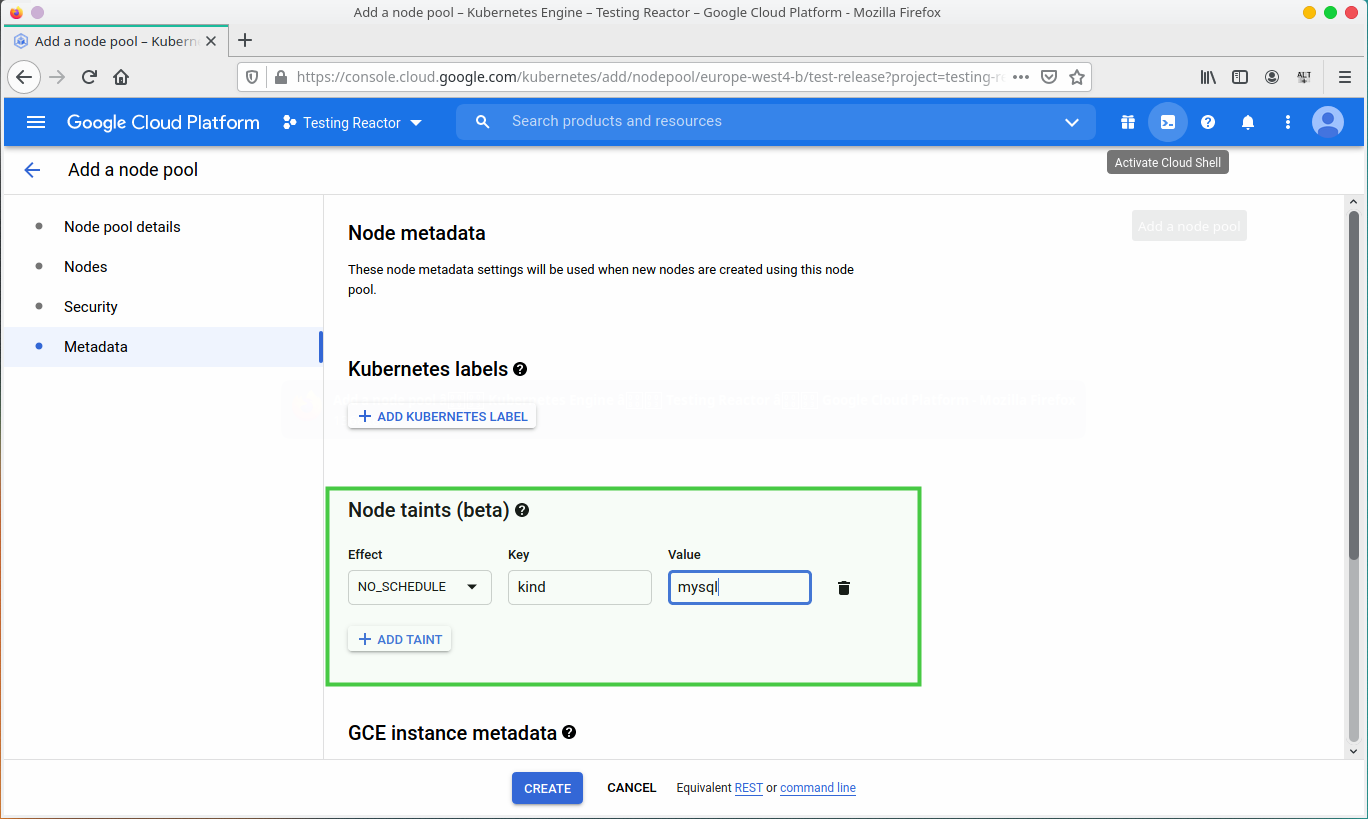
A taint has 3 values: key, mysql and effect, you can read more in the
Kubernetes documentation
. In this example, we’ll use the key kind, value mysql and effect NO_SCHEDULE.
Create the cluster and you’re all set.
Add taints after you’ve created the node pool
NOTE
If you’ve added the taints when creating the node pool, skip this and go to Setup Tolerations from the Bitpoke App .
kubectl taint nodes <NODE_NAME> <KEY>=<VALUE>:<EFFECT>
The key and value must be a string, and the EFFECT can be NoSchedule, PreferNoSchedule, NoExecute. For this example, we’ll use NoSchedule.
If you have selected the Match All toleration effect in the Bitpoke App, this means you want to add a toleration with all the effects, in this case taint will be:
kubectl taint nodes <NODE_NAME> <KEY>=<VALUE>:NoSchedule <KEY>=<VALUE>:NoExecute <KEY>=<VALUE>:PreferNoSchedule
List all the Kubernetes pods to get the name of the ones from the node pool where you want to add your taints:
kubectl get nodes
[ioana@ioana-pc Desktop]$ kubectl get nodes
NAME                                          STATUS   ROLES    AGE    VERSION
gke-test-release-default-pool-40da0260-526g   Ready    <none>   160m   v1.16.15-gke.6000
gke-test-release-default-pool-40da0260-675c   Ready    <none>   160m   v1.16.15-gke.6000
gke-test-release-default-pool-40da0260-gmpv   Ready    <none>   160m   v1.16.15-gke.6000
gke-test-release-pool-1-82b9b593-49wm         Ready    <none>   112s   v1.16.15-gke.6000
gke-test-release-pool-1-82b9b593-5x4f         Ready    <none>   109s   v1.16.15-gke.6000
gke-test-release-pool-1-82b9b593-j3d2         Ready    <none>   111s   v1.16.15-gke.6000
gke-test-release-pool-1-82b9b593-t2p4         Ready    <none>   111s   v1.16.15-gke.6000
Take one by one the pod names from the pool-1 and add the taints:
kubectl taint nodes gke-test-release-pool-1-82b9b593-49wm kind=mysql:NoSchedule
kubectl taint nodes gke-test-release-pool-1-82b9b593-j3d2 kind=mysql:NoSchedule
kubectl taint nodes gke-test-release-pool-1-82b9b593-t2p4 kind=mysql:NoSchedule
kubectl taint nodes gke-test-release-pool-1-82b9b593-5x4f kind=mysql:NoSchedule
Setup tolerations and scheduling from the Bitpoke App
The next step is to go to the Bitpoke App and setup the NoSchedule toleration for the MySQL cluster, with the same key and value used to taint the nodes, in this example key: kind, value: mysql.
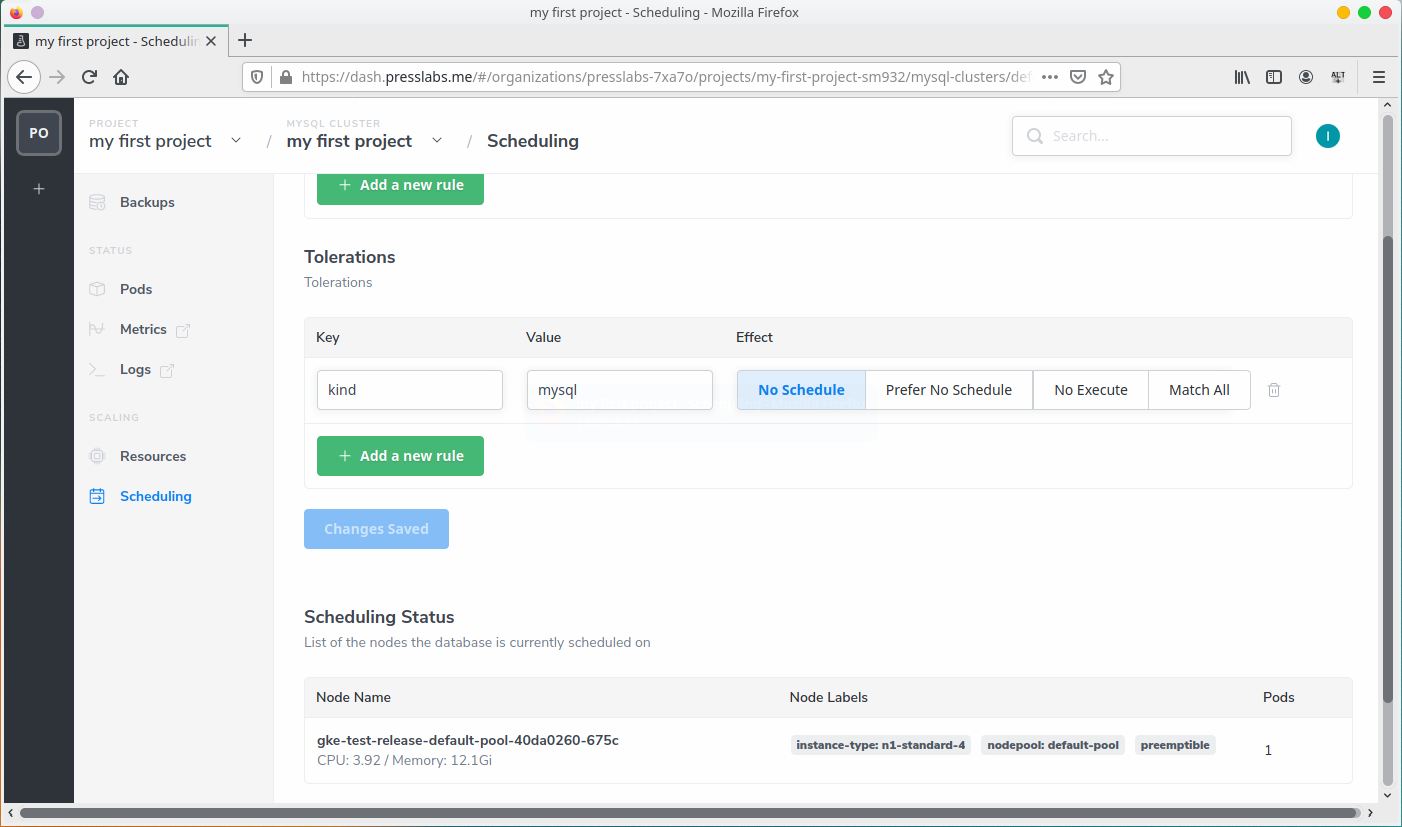
After you add this toleration, you need to schedule the MySQL cluster to only run on the new node pool you’ve created, in this case pool-1:
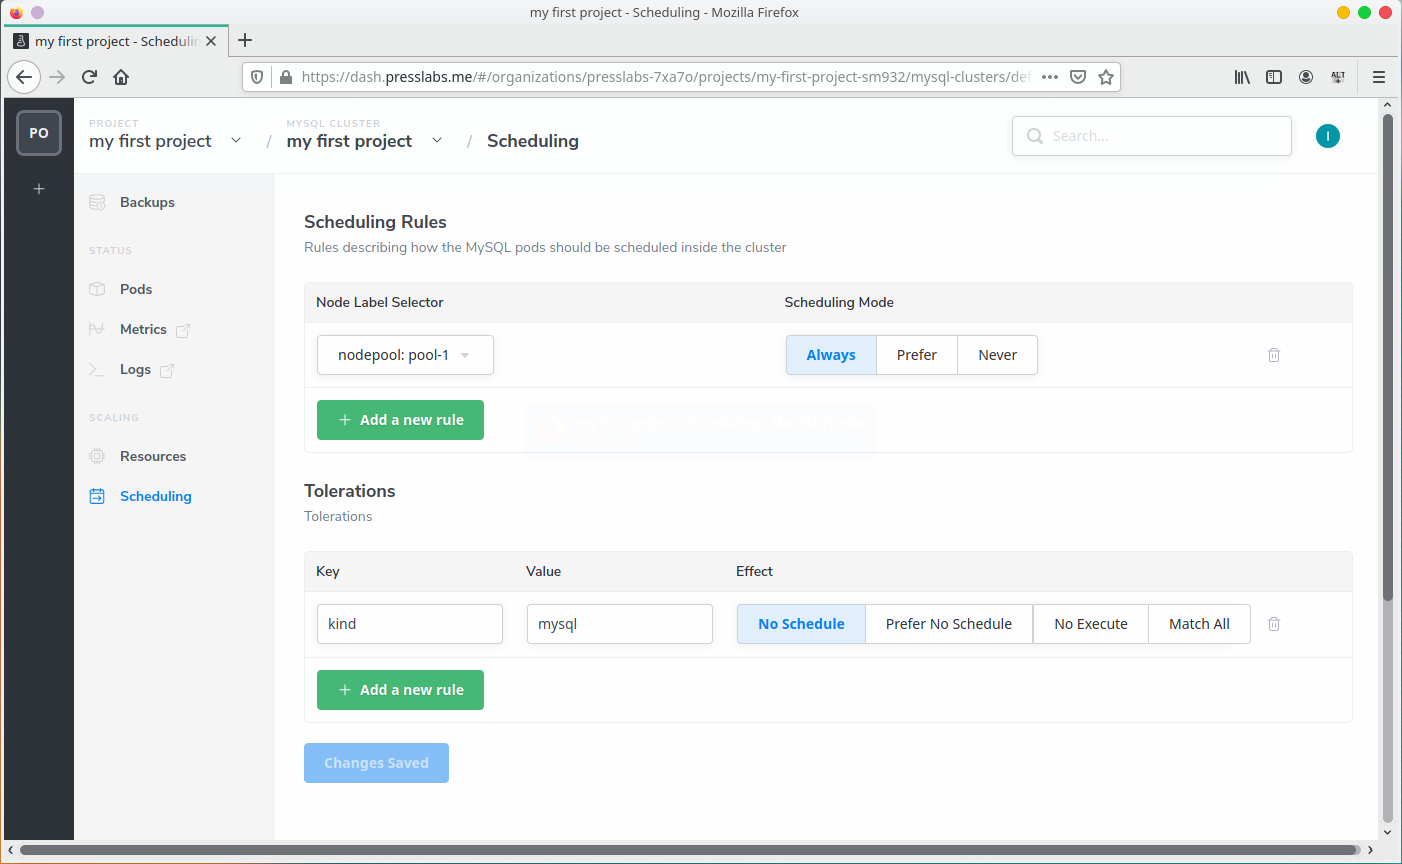
Don’t forget to Save the Changes.
Recreate the pods
NOTE
After you make any scheduling changes, you need to delete the pods so they can re-create according to the new rules.
To delete the pods, you can go to the Pods section of Memcached/WordPress/MySQL Cluster and delete the pods you want to be rescheduled.
For example, in our case, MySQL currently runs on the default node pool, so we need to delete this pod so that it generates on the new node pool pool-1.
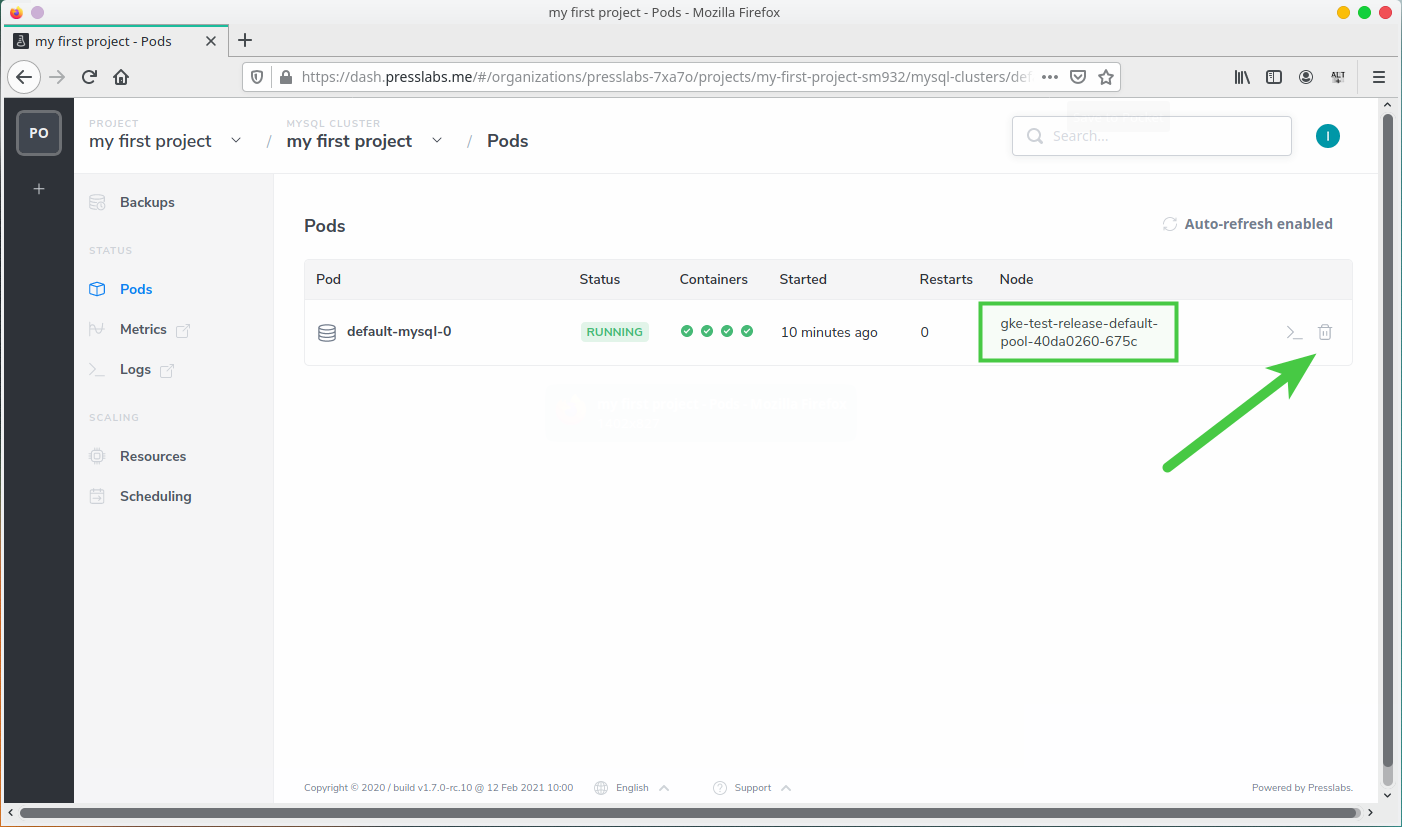
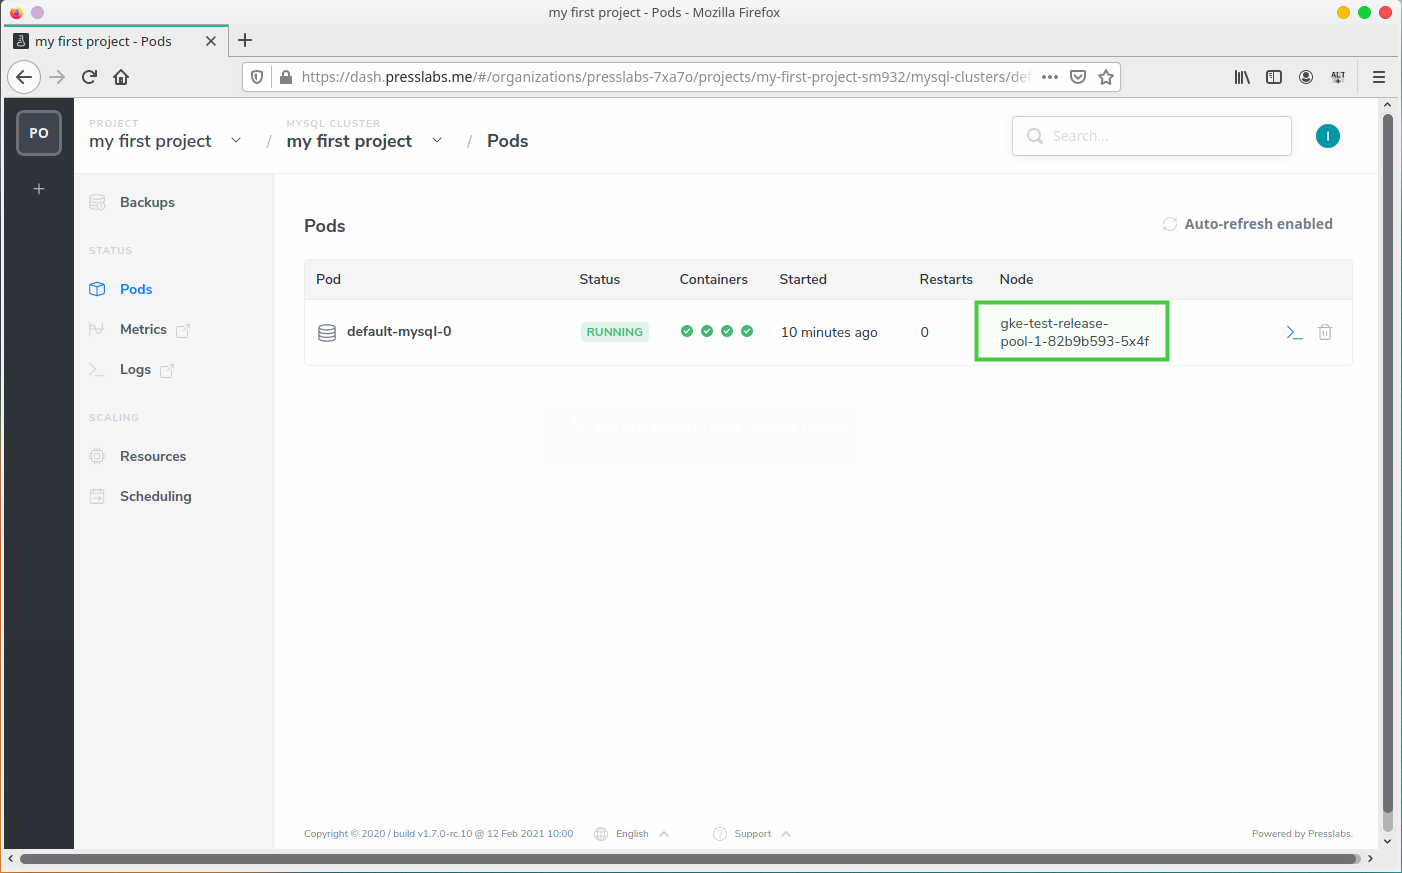
Verify the pods
The last step to to is verify that the site is running and the pods are now scheduled on the right components. The MySQL cluster should now run on this new node pool you’ve created and setup, in this case pool-1, and the other nodes won’t stick to it, because they don’t have the same tolerance:
If you try to schedule another component on this node (for example, WordPress or Memcached), you will get errors, as they don’t have the respective toleration.