Install
The Bitpoke App for WordPress features a simple wizard tool guiding you in a few simple steps to install from Google’s Cloud Marketplace, after making sure you’ve prepared the Kubernetes cluster in the prerequisites step.
Time required: 10 minutes
NOTE
Make sure you’ve followed all the steps from App Prerequisites .
Install the App
Go to the Google Cloud Marketplace and search for “Bitpoke App”.
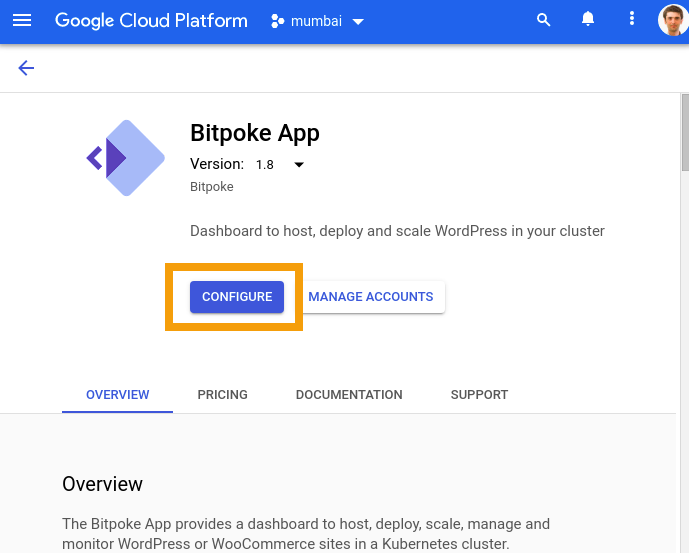
To install the Bitpoke App for WordPress, click CONFIGURE and enter the following:
-
Cluster: the cluster you’ve created when going through the App Prerequisites will automatically appear here; you can also quickly spin a new cluster directly from here, by clicking Create a new cluster.
NOTE
If you’ve created a cluster and it doesn’t appear here, most likely it has lower resources then recommended, so double-check you’ve followed the prerequisites .
NOTE
Make sure that the cluster you want to install the App on isn’t scaled to 0: go to your cluster on Google Cloud and check the number of nodes.
-
Namespace: you can leave the default one
-
App-instance-name: the name of your App install
-
Bitpoke App Service Account: create a new service account
-
Bitpoke App Domain: the domain for the Bitpoke App, e.g.
dash.myagency.com -
IP Address: Enter your reserved IP address here. If left empty a temporary IP address will be appointed.
-
Reporting service account You can simply allow the preset
Create new service account.NOTE
For a production environment it is recommended to reserve a static IP .
You’ll also have to check and confirm:
- I acknowledge that Workload identity must be enabled for the Bitpoke App to function properly
- I acknowledge that Application Manager addon must be enabled for the Bitpoke App to function properly
- I acknowledge that Config Connector addon is enabled and configured and it’s required for the Bitpoke App to function properly
- I accept the GCP Marketplace Terms of Service.

If you’ve carefully followed all the
prerequisites
, now press Deploy.
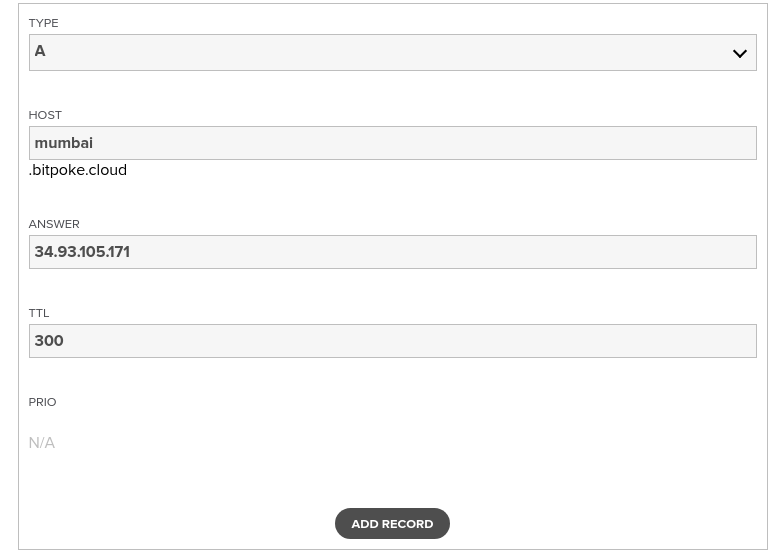
Set DNS record
That’s it, you’ve successfully deployed the Bitpoke App. All that’s left to do now is set the A DNS record at your name-server provider. For example, if you’ve chosen the domain mumbai.bitpoke.cloud for your Bitpoke App domain, you’ll need to add an A record for the subdomain mumbai and the Ingress IP address you see in your Bitpoke App. Here’s an example on name.com:
To connect to the Dashboard for the first time, go to Kubernetes Engine - Applications - Bitpoke App, click on preview secret data and copy the install wizard link in your browser.
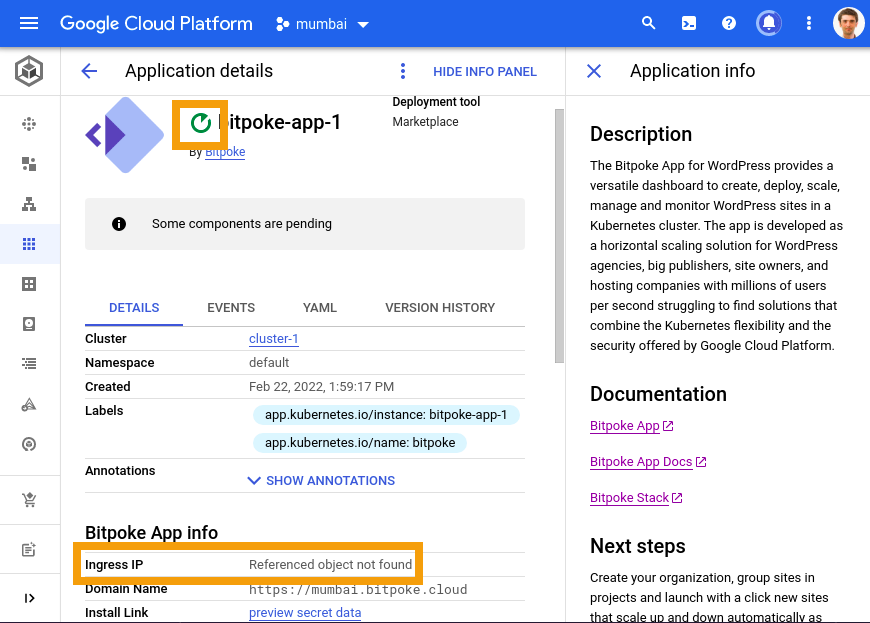
If the installation is still in progress, you might notice the Referenced object not found message instead the IP value or the install link. Wait a couple of minutes for the process to complete to have the proper values rendered.
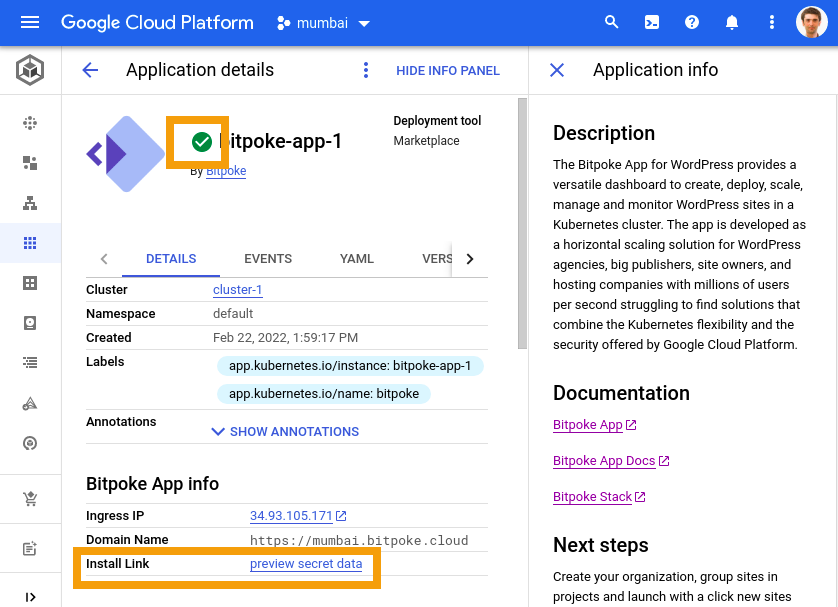
Get install wizard link
Keep in mind that the installation link regenerates every 2 hours and you’ll have to go back to the Bitpoke App on GCP and copy the fresh install link to access the App wizard link again.
The install link will get you to the App configuration wizard, so now you can finalize the setup .