App authentication
Set Google OAuth authentication to secure the Bitpoke App and prepare credentials for the configuration wizard.
Time required: 10 minutes
Set Consent Screen
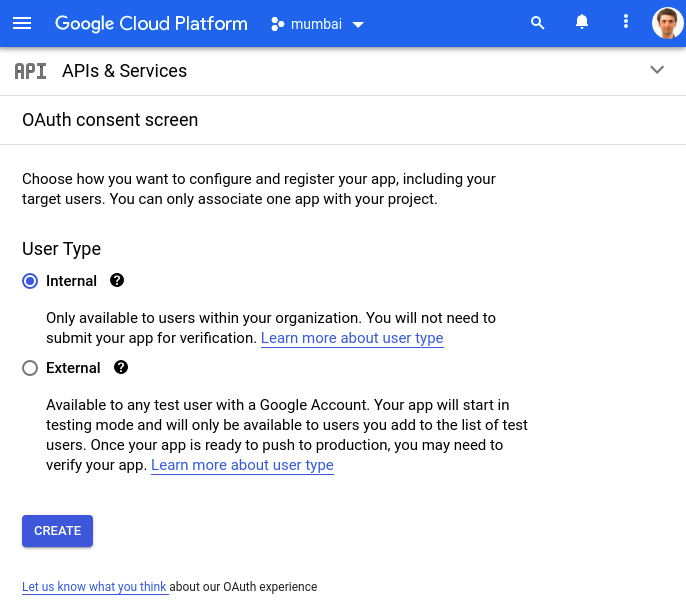
Before setting up credentials, you will need to configure the Consent Screen. This will be the page shown to users trying to log into the app.

If you want to use the app only for internal domain users(meaning users belonging to your Google Workspace), you might find the Internal type more convenient, since it does not require approval from Google.
If you are considering giving access to the App to other users than the ones in your domain, you might do so in two steps: first select the External type of access and then pick Testing. This will allow you to grant access to a limited number of external users. If this is what you need, after testing it out, you can switch to Production, which will automatically prompt Google to start the review process.
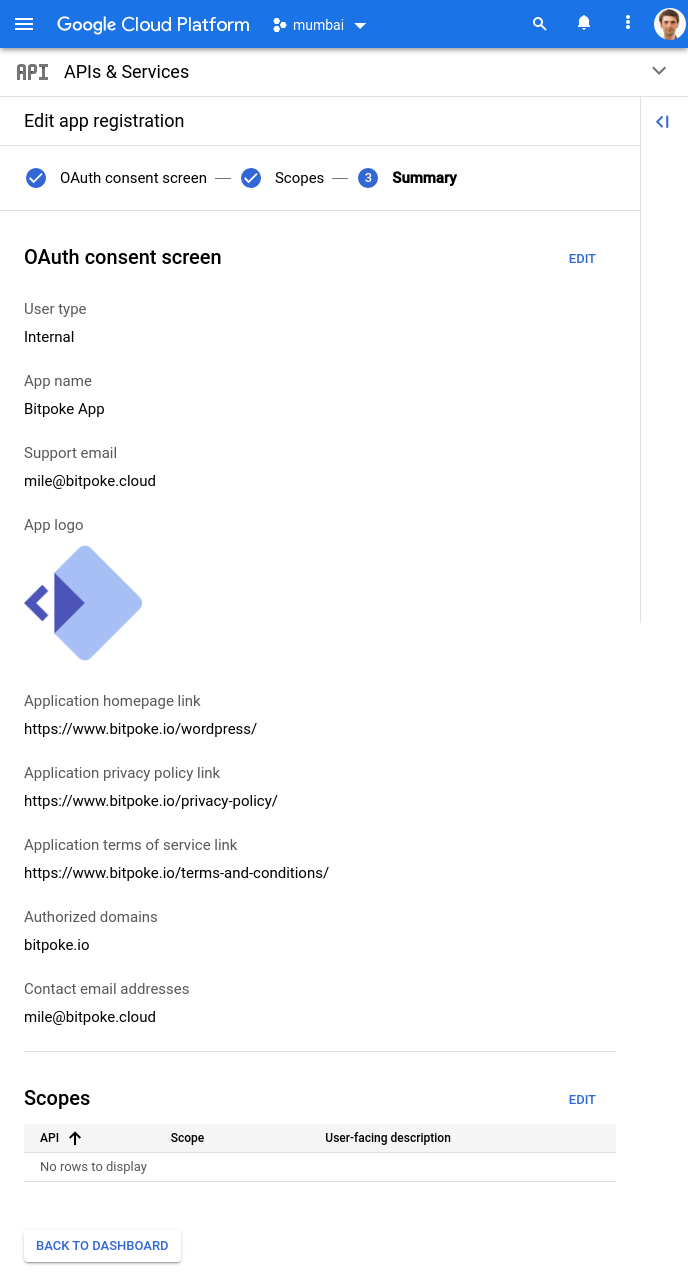
As a first step, you’ll need to enter your app details, fill in the privacy policy, terms and conditions, as well as approved domains that users can log in from.

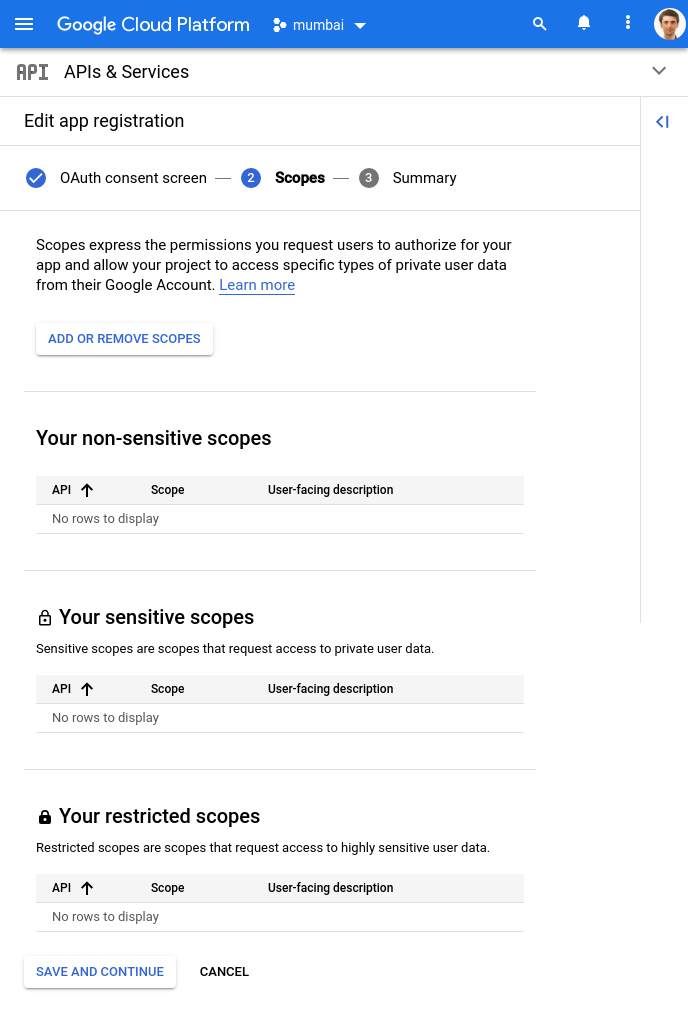
Next step is to set the scopes, ie access rights that the app can get to access users' Google data.
After you’ve clicked Save, you’ll be prompted with a summary of the settings. You’re prepared now to do the actual authentication set-up.
Create OAuth credentials
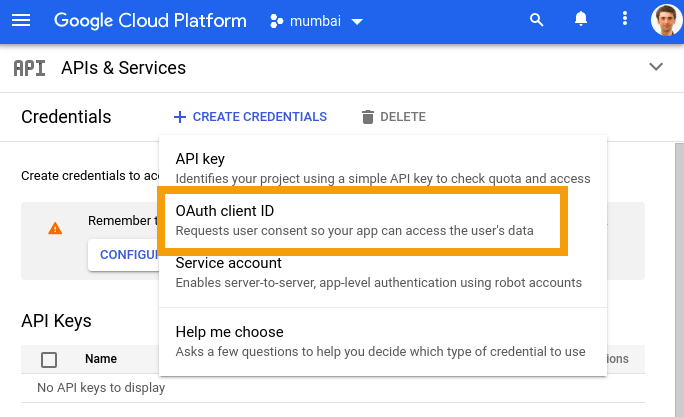
In the Google Cloud Platform, go to the
Credentials page
on APIs & Services -> Credentials and choose Create Credentials, then select OAuth client ID. Make sure you have selected the project where you’ve installed the Bitpoke App in.
Here you need to choose the application type Web Application and click to add the domain that you choose for the Bitpoke App when you installed it, e.g. https://mumbai.bitpoke.cloud/. Pay attention to adding the trailing slash.
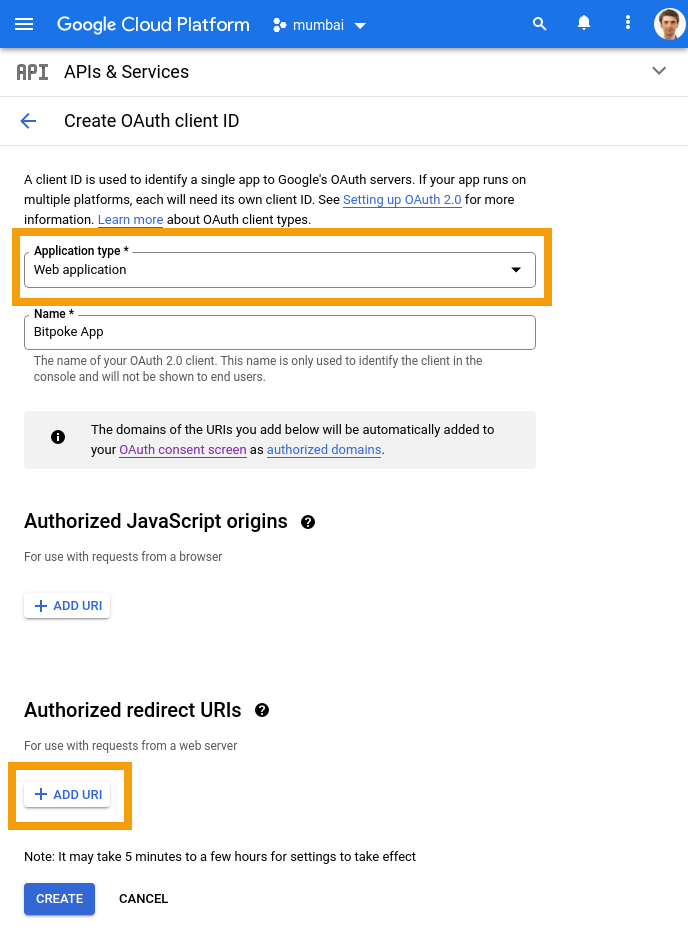
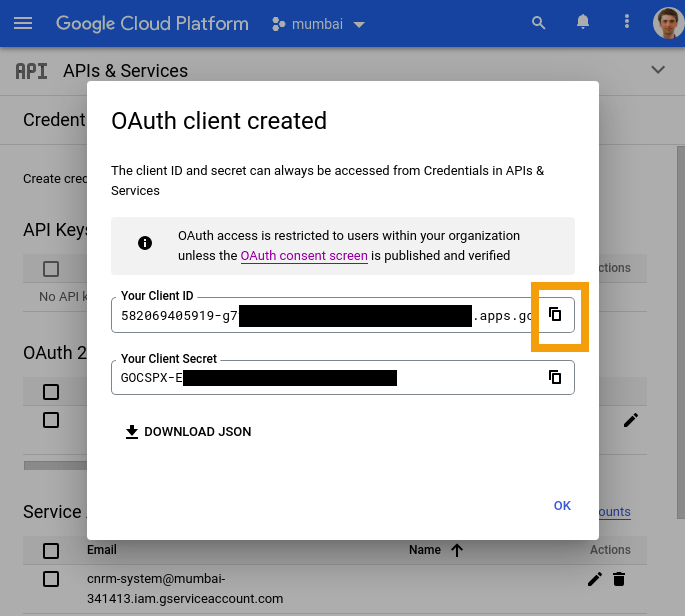
Click on Create and you’re all set. Note down the Client ID because you need them to
Configure App
:
The authentification to the Bitpoke App can be made through Auth0 as well. Follow the Auth0 authentication setup tutorial.