Prerequisites
Before installing the Bitpoke App from Google Cloud’s Marketplace, there are some prerequisites that need to be met.
Time required: 15 minutes
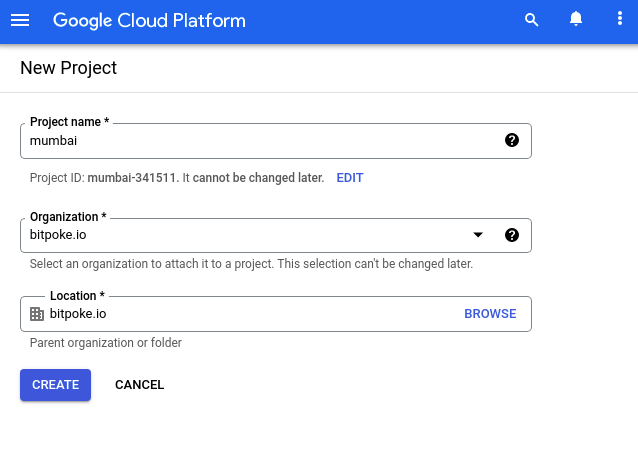
Create a new Google Cloud project
The Bitpoke App is only available on Google Cloud Platform’s Marketplace for now, so you need to have a Google account and an active plan to be able to use it. For testing purposes, you can also use their 12-month free trial with $300 credit, on their Google Cloud Platform Free Tier page you can see more information.

You also need to have a project created, you can create a project from here .
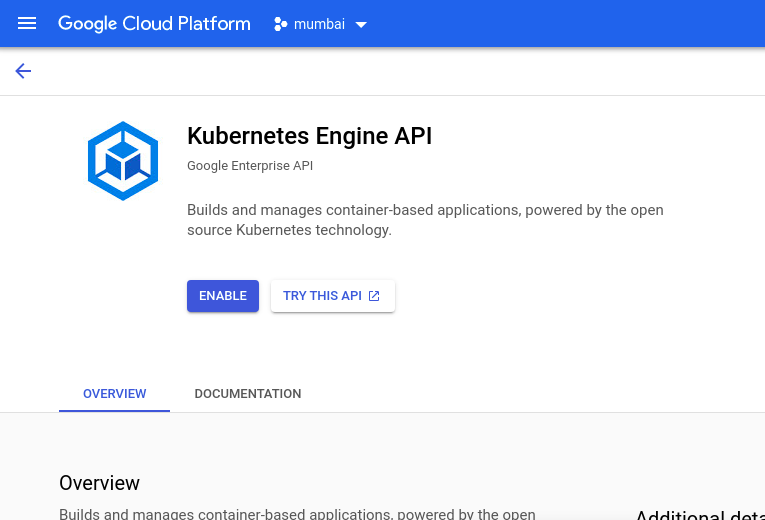
Enable Kubernetes API
In the
Google Cloud Console
navigate in the menu to Kubernetes Engine -> Clusters. Make sure to enable the Kubernetes API.
Start creating a cluster
Now you need to start the creation process of a Standard Cluster:
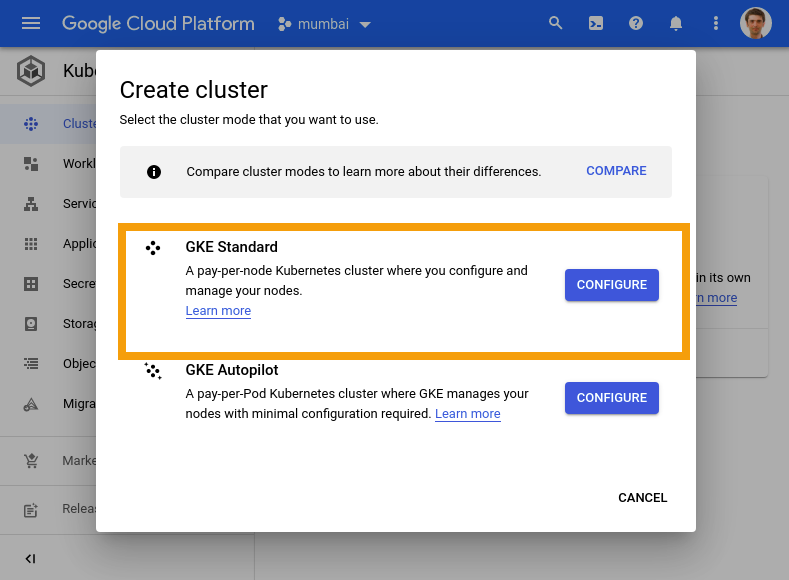
You can create a standard cluster with the default settings and minimum 3 nodes, or any settings suited to your needs, but make sure you have the following:
Configure the cluster machine type
It should have at least 4 vCPU and 15 GB memory.
Go to Node Pools -> Default Pool -> Nodes to choose your machine type:
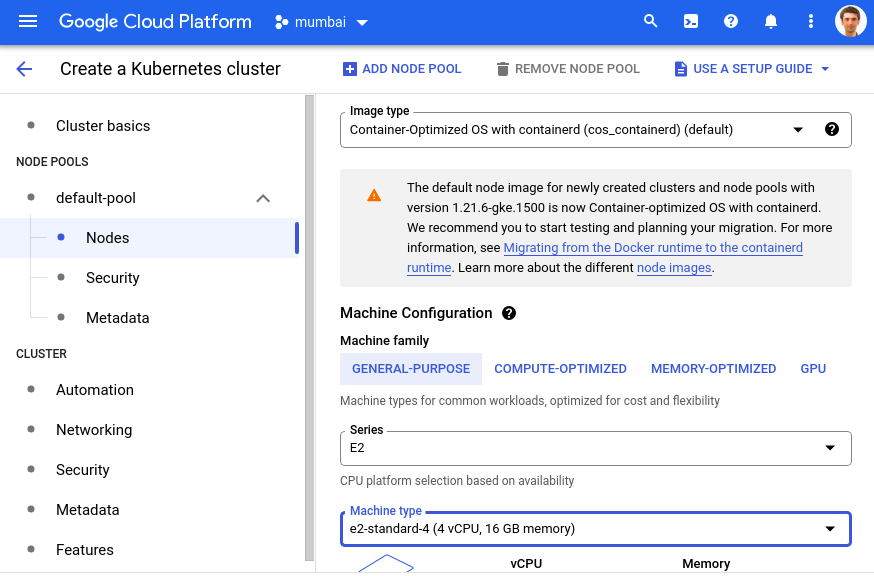
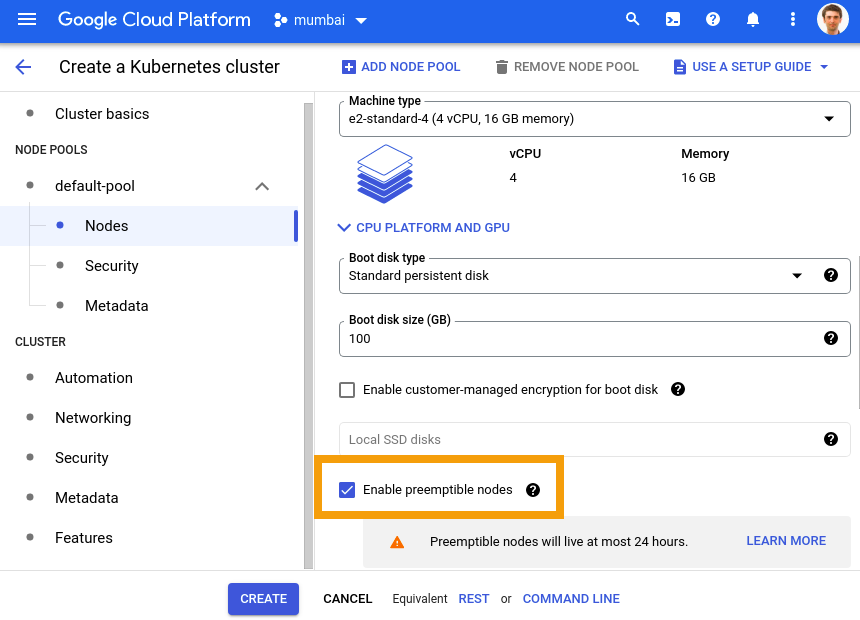
For example, you could choose machines like e2-standard-4, n2-standard-4. For a development cluster, you could mark the nodes as preemptible, meaning they would be much cheaper, but in exchange they would have a lower uptime and would be subject to allocation availability as defined by Google Cloud.
NOTE
You can use smaller machines for testing purposes, just to start the App. For example, you might take advantage of the free trial Google is offering . You could create smaller machines to test out exclusively the interface of the Bitpoke App and check out the features it offers, but keep in mind that your sites won’t work properly unless your machine type has at least 4 vCPUs and 15 GB memory.
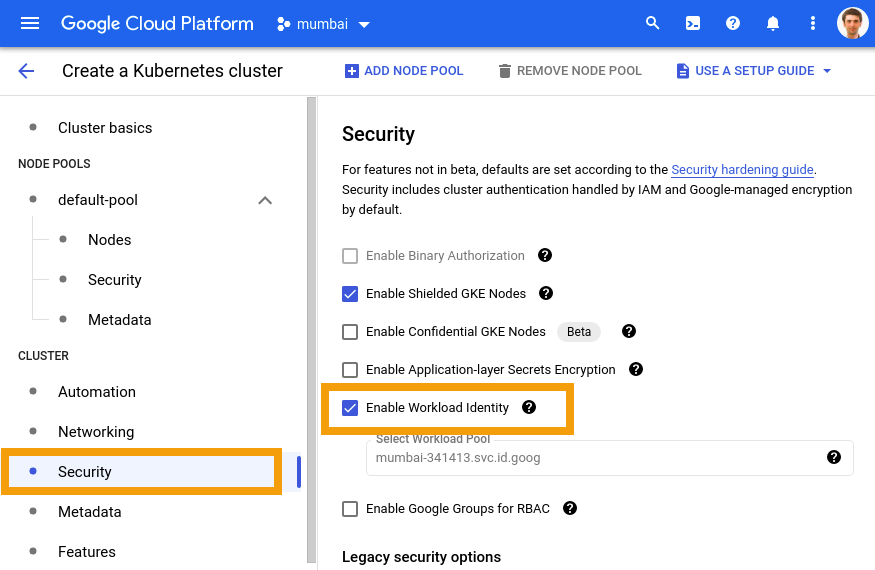
Enable Workload Identity
Go to Cluster -> Security to enable Workload Identity:
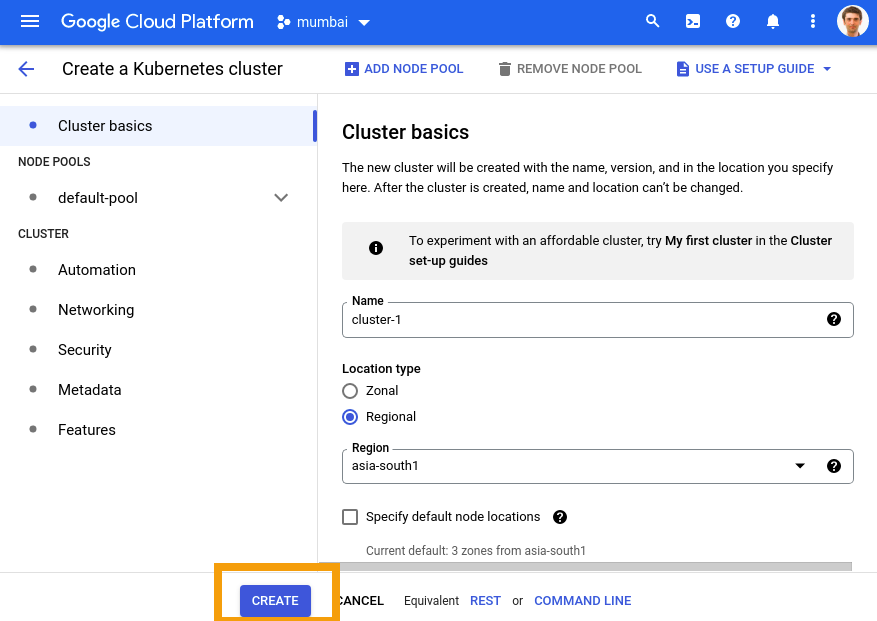
Finalize cluster creation
Remember to click the Create Button on the lower side of the form. It takes a few minutes for the request to be completed. You’ll be notified through a message on the top of the console.
Connect to the cluster with Google Cloud Shell
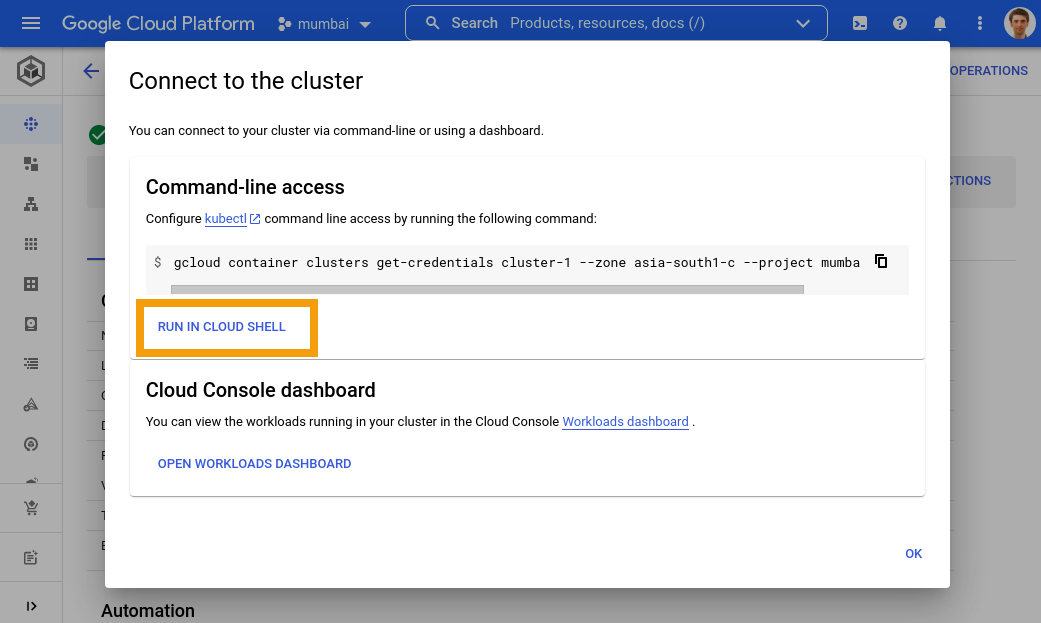
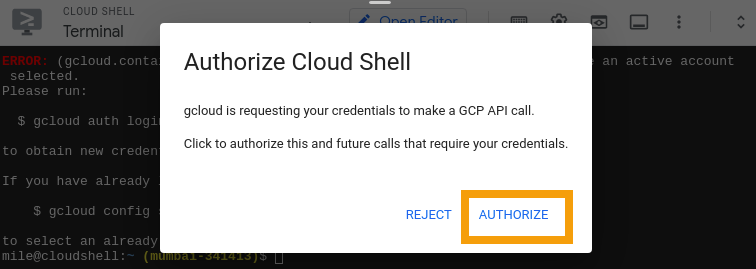
Once the Cloud Shell has started, press enter to run the generated command, then click Authorize it to run GCP API calls.
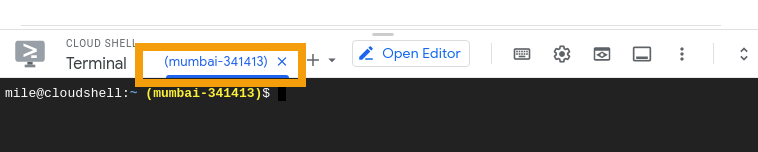
Find your Project ID
You’ll need this for the following steps. Make sure to use the proper project ID instead of our sample, which is mumbai-341413. You can find your project ID (we’ll use the placeholder YOUR_PROJECT_ID instead) in the tab header of your Cloud Shell.
Enable Application Manager
Application Manager needs to be enabled from the Cloud Shell. Make sure to fill in the right Project ID, in our case mumbai-341413, cluster name mumbai-cluster and zone asia-south1.
gcloud --project mumbai-341413 beta container clusters update mumbai-cluster --zone asia-south1 --update-addons=ApplicationManager=ENABLED
Choose a domain for the App
You need a domain or subdomain that the Bitpoke App can use. For example, if you already have the domain bitpoke.cloud for your agency, you can choose to set up the Bitpoke App on a subdomain such as mumbai.bitpoke.cloud.
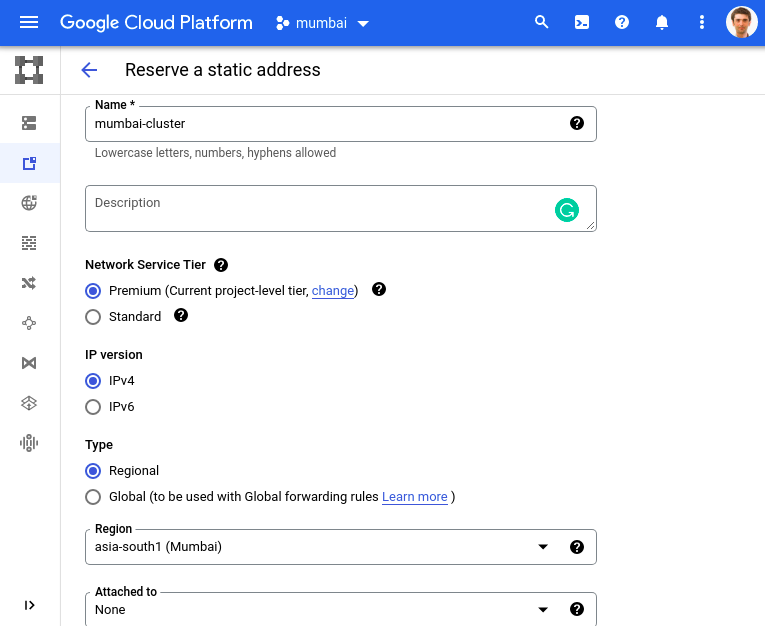
Reserve an IP on Google Cloud IP
NOTE
This step is optional if you want to quickly test the App, but keep in mind that for a production site it’s recommended to reserve an IP.
-
Go to the Google Cloud Console
-
Select
VPC Network->External IP addresses->Reserve Static AddressSelect IPv4 and Regional, with the same region as your cluster.
-
Hit Reserve
The next step is to point your DOMAIN DNS record to the freshly reserved IP, for example mumbai.bitpoke.cloud.
Now you can proceed with actually installing the Bitpoke App .